

Ever get that insane craving for those warm, yeasty, ridiculously buttery bread rolls you only seem to find at your favorite steakhouse? I know I do! Forget waiting in long lines to get them—this is my foolproof, kitchen-tested Texas Roadhouse rolls copycat recipe, and trust me, it’s the softest, fluffiest batch you will ever bring to the table. My grandmother Daisy always said that nothing gathered people faster than the scent of fresh bread, and these homemade yeast rolls absolutely prove her right. They are surprisingly simple to make, even if you’re nervous about working with yeast. Get ready for the best homemade yeast rolls you’ve ever eaten!
- Why You Will Love These Texas Roadhouse Rolls Copycat
- Essential Ingredients for Perfect Texas Roadhouse Rolls Recipe
- Step-by-Step Instructions for Homemade Yeast Rolls
- Baking and Brushing for Golden Texas Roadhouse Rolls
- Making the Texas Roadhouse Cinnamon Butter
- Tips for Making Holiday Rolls for a Crowd
- Serving Suggestions for Your Texas Roadhouse Rolls Recipe
- Frequently Asked Questions About Texas Roadhouse Rolls
- Estimated Nutritional Data for These Copycat Restaurant Bread Rolls
- Share Your Experience Making These Rolls
Why You Will Love These Texas Roadhouse Rolls Copycat
Honestly, ditching the restaurant for this bread is a win-win. Once you try making these at home, you might never go back! They nail that perfect steakhouse experience without any fuss.
- Incredibly soft fluffy dinner rolls that melt in your mouth.
- The perfect balance of sweet dough and rich, buttery finish.
- Easily scalable if you need holiday rolls for a crowd.
- They freeze beautifully, making them the perfect make ahead freezer rolls.
Essential Ingredients for Perfect Texas Roadhouse Rolls Recipe
When we’re making these beauties, every ingredient counts. This isn’t the time to substitute something just because it’s sitting in the pantry. We want that authentic texture and flavor that reminds you of the restaurant, which is why I wrote down exactly what my tests revealed works best. You’ll need warm water—and I mean *warm*, not hot—to wake up that yeast. We use a bit of sugar, both for feeding the yeast and for that subtle sweetness in the final dough.
We fold in whole milk and melted butter since we need that richness, plus one egg to bind everything together perfectly. Then, the flour and salt bring up the anchor. Make sure you use active dry yeast unless you adjust the initial rest time!
I learned so much about ingredient quality just by watching my grandmother; it really makes a difference when trying to achieve that genuine copycat restaurant bread feel.
Ingredient Notes and Substitutions for Soft Fluffy Dinner Rolls
Okay, let’s talk details. That whole milk is crucial because the fat content really helps produce those soft fluffy dinner rolls we are aiming for—don’t substitute skim if you can help it! Always check your yeast packet, but generally, if you’re using instant yeast, you can skip the 5-minute rest period and mix it right in with the dry ingredients. That initial foamy activation is proof that your yeast is alive and ready to work its magic!
Step-by-Step Instructions for Homemade Yeast Rolls
This is where the real magic happens, and I promise you, mastering these homemade yeast rolls is easier than you think. We are moving from liquids to solids very methodically to ensure we develop a beautiful dough structure. If you’re feeling lazy (totally valid!), remember you can toss all the wet and dry ingredients into your bread machine and just use the dough cycle to do all the mixing and kneading for you. That’s my secret weapon on busy days!
Activating the Yeast and Mixing the Dough
First things first: The yeast needs to wake up! Combine that warm water, the yeast, and just a tiny bit of the sugar. Watch it closely, because you need that foamy top within about 5 to 10 minutes. If it doesn’t foam, toss it out and start over—dead yeast means flat rolls, and we aren’t making flat bread today!
Once it’s happy and bubbly, whisk in the remaining sugar, the warm milk, the melted butter, and that single egg. In a separate bowl, make sure your flour and salt are well mixed. When you start adding the dry stuff to the wet, add it slowly. We’re looking for a shaggy dough to form—don’t dump all the flour in at once around Step 4, or it gets stiff too fast!
Kneading and First Rise for Texas Roadhouse Rolls
Now, you need to get those hands working! Turn that shaggy mess onto a floured counter and knead it for a firm 5 to 7 minutes. You’re done when it feels smooth and elastic, like a really nice pillow. It should spring back when you poke it gently. I always put my dough bowl near the oven vent while it’s preheating during the first rise—that little pocket of warmth works wonders for getting a fast, high rise!
Cover it up tight and let it sit in a warm spot for about an hour to an hour and a half. You want it perfectly *doubled* in size. Don’t rush this, patience here equals fluffy rolls later!
Shaping and Second Proofing
Once doubled, gently punch that air out—don’t deflate it completely, just release the big bubbles. Now, divide that dough into 18 to 20 even little pieces. Roll each bit tightly into a smooth, taut ball. This tightness is what gives them that gorgeous bakery look.
Line them up close together in your greased 9×13 pan. Seriously close, because they need to bake into each other to get that classic pull-apart texture. Cover them loosely and just let them hang out for another 30 to 45 minutes until they look puffy and crowded. They should almost be touching across the pan before they go into the oven!
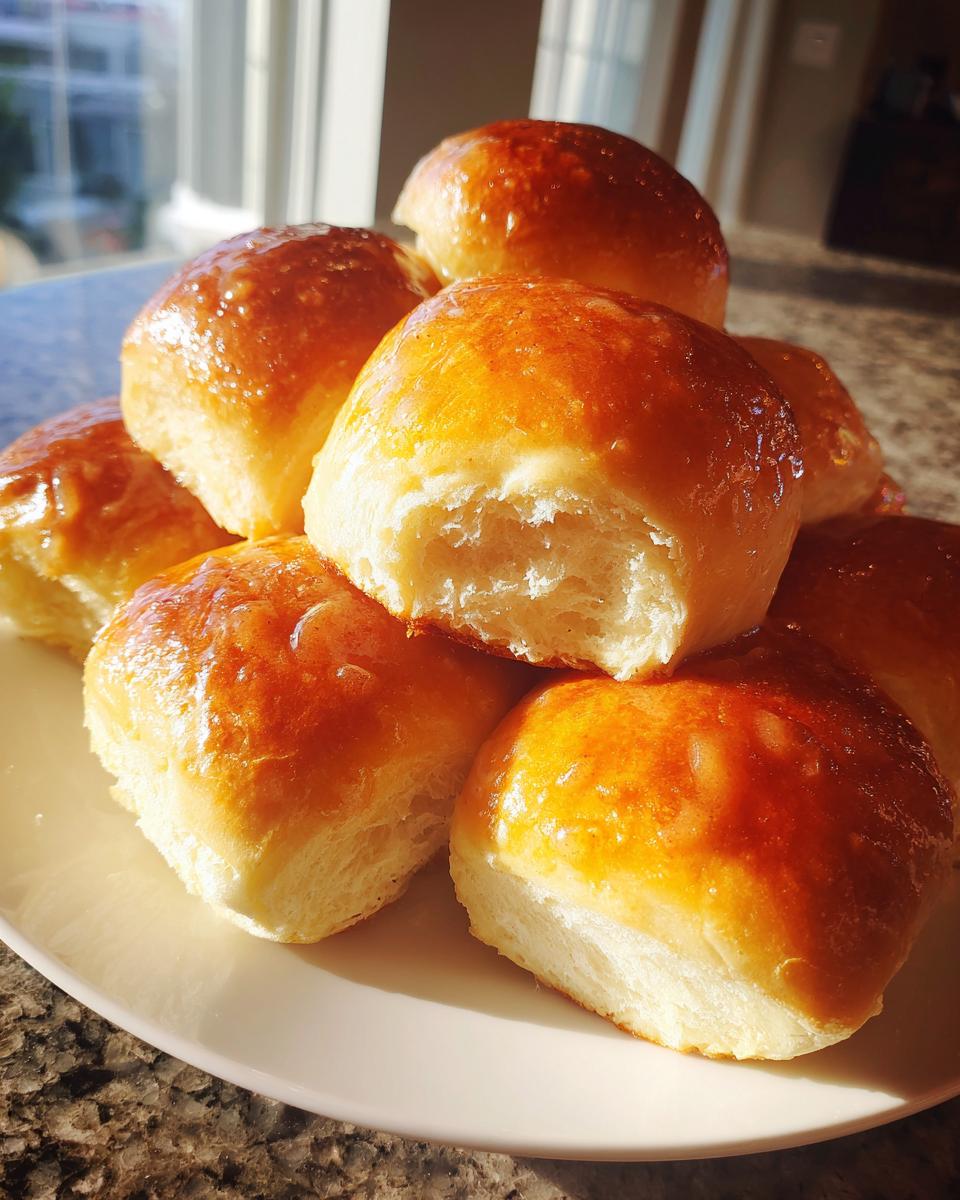
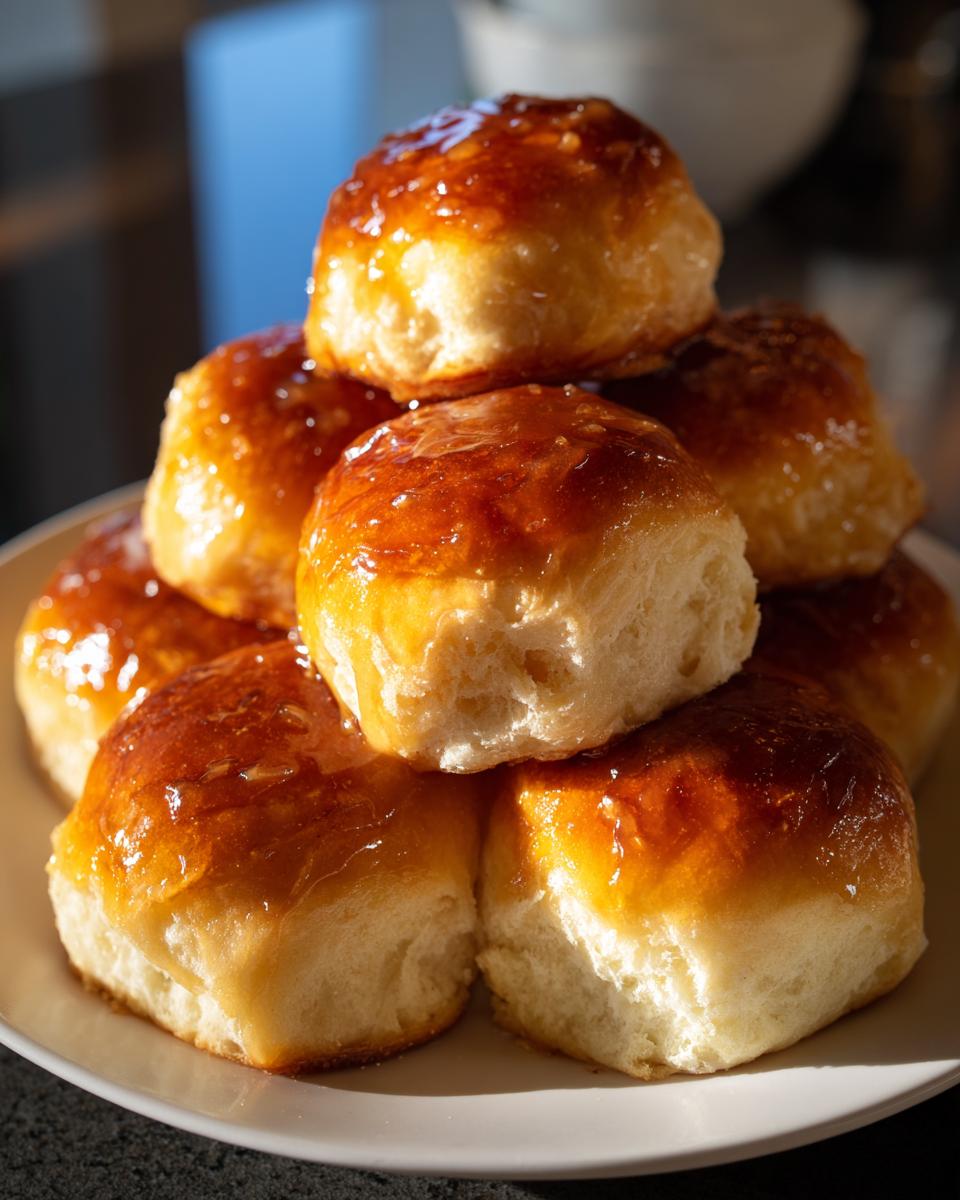
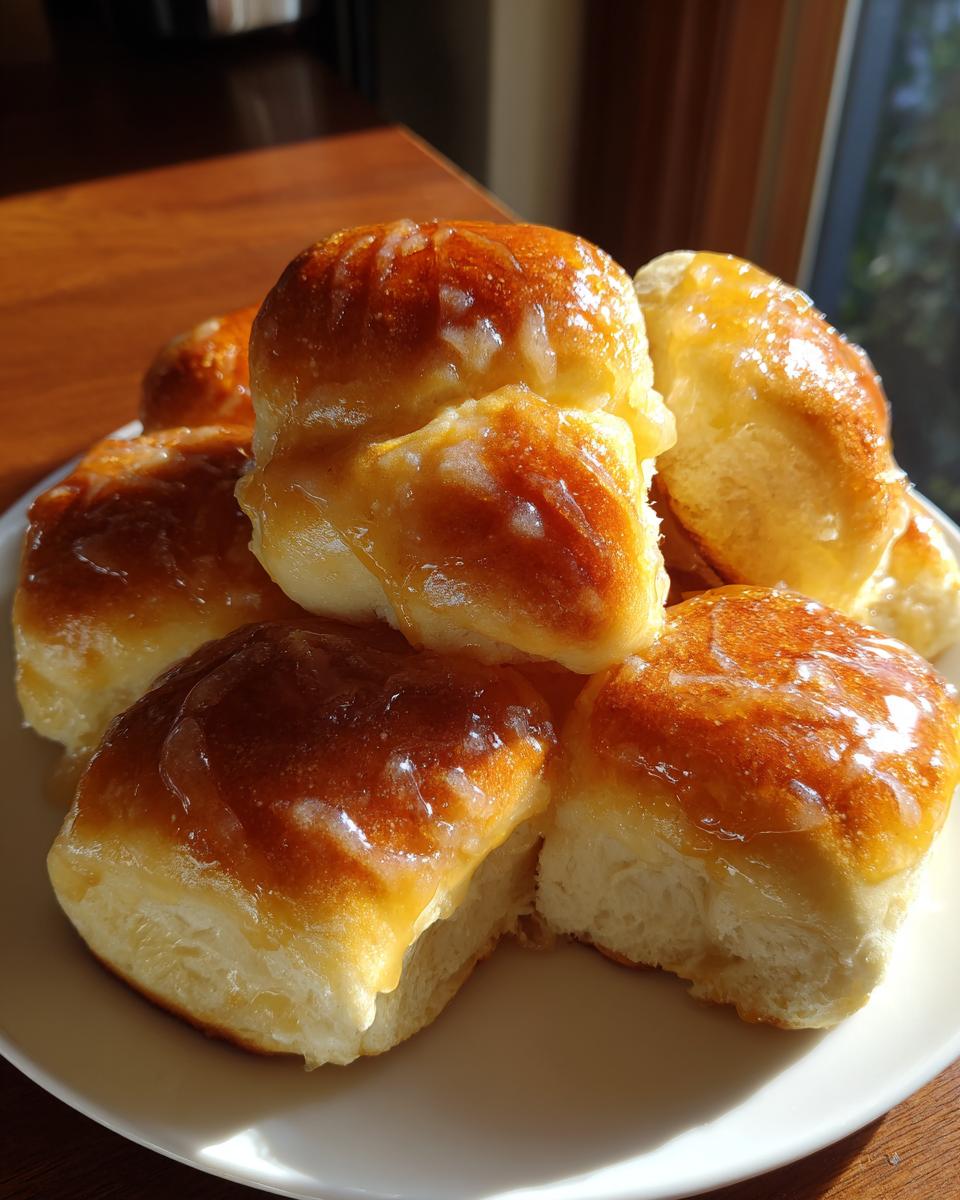
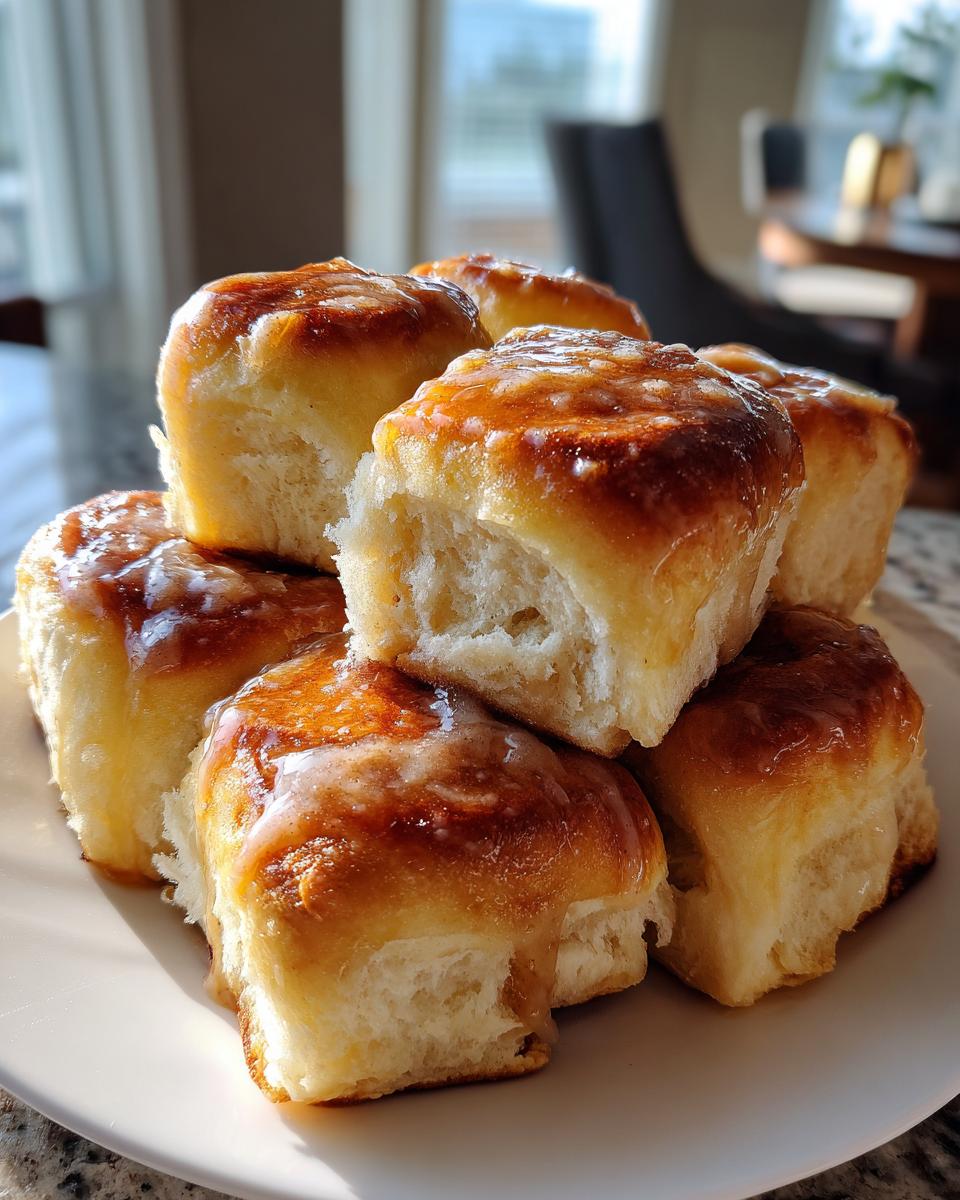
Baking and Brushing for Golden Texas Roadhouse Rolls
Alright, the dough has proved, the rolls are puffy and ready to mingle in the pan—it’s time for the oven! Preheat that beauty to 375 degrees F. This medium heat is perfect for letting the inside cook through completely before the outside gets too dark. Our baking window is usually tight, about 15 to 18 minutes. You’re looking for a deep golden color on the top when they are done.
But here is one of the biggest secrets to getting that soft, slightly shiny, restaurant-quality finish: the quick butter bath! As soon as those pans come out of the oven—and I mean *immediately*—grab some extra melted butter and brush, brush, brush those tops generously. Don’t be shy about drowning them a little bit! This step stops the crust from hardening up and keeps the whole roll incredibly tender and moist. It’s the finishing touch that makes them taste exactly like the real deal.
Let them cool just long enough that you can handle them, and then bring out the cinnamon butter. Trust me, eating these straight from the pan while they are still steaming is pure heaven.
Making the Texas Roadhouse Cinnamon Butter
Okay, you can’t have those amazing rolls without the best dipping butter in the world! This Texas Roadhouse cinnamon butter is so easy, it feels almost cheating. You just need butter that’s nice and soft—leave it out on the counter for an hour beforehand, but don’t use melted butter, or it won’t whip up right!
In a small bowl, grab your softened stick of butter and beat it until it looks creamy by itself. Then, toss in the powdered sugar, the honey, and that essential cinnamon. Beat it all together until it’s light, dreamy, and perfectly fluffy. It should be spreadable but still hold its shape a little bit on your warm roll. Seriously, homemade is 100 times better than store-bought!
Tips for Making Holiday Rolls for a Crowd
If you’re thinking about making these for Thanksgiving dinner rolls or any big holiday spread, the great news is that they are fantastic for planning ahead! This recipe naturally scales up really well. Since we are making 18 to 20 rolls here, you can easily double the entire batch if you need holiday rolls for a crowd—just be sure you have a big enough bowl for that first rise!
But my absolute favorite cheat is using them as make ahead freezer rolls. You can freeze the dough right after that second rise, which is a lifesaver when your oven is packed full of turkey and stuffing! After they puff up the second time, cover the pan tightly and pop it straight into the freezer until it’s rock hard. When you’re ready to bake, just thaw the pan completely on the counter. Once they warm up a bit, they’ll need that final 30-minute puff before going into the 375-degree oven. Pop them in the oven as directed, and you’ve got fresh rolls with minimal effort on the big day!
Serving Suggestions for Your Texas Roadhouse Rolls Recipe
Look, I know the main reason you’re here is for those perfect, buttery rolls, but you really need ideas for what to serve them *with*, right? These aren’t just dessert rolls—they are the perfect sidekick to almost any savory main course. Think about it: you have these soft, slightly sweet Texas Roadhouse rolls soaking up whatever deliciousness you put on your plate.
If you’re planning a big steak night, these are a non-negotiable side dish. They are practically *made* for soaking up every last drop of pan sauce or au jus. My kids actually prefer making little sandwiches out of them sometimes if we have leftover barbecue pulled pork—they hold up surprisingly well!
But they shine just as brightly with comfort food. Seriously, next time you make a big pot of hearty chili or even a creamy tomato soup, put these rolls on the side instead of cornbread. That little bit of sweetness from the honey in the side-butter cuts through the richness of the soup perfectly. It makes the whole meal feel instantly more special, even if the main course was something super easy you threw together after work!
Frequently Asked Questions About Texas Roadhouse Rolls
I know when I first start messing with a new yeast recipe, I always have a million little questions buzzing around my head. Don’t worry if you do too! These are the questions I hear most often when people try to bake my Texas Roadhouse rolls copycat recipe at home, so let’s clear those up right now so you can get baking!
Can I use the dough cycle on my bread machine?
Oh, absolutely! I mentioned it briefly, but I’ll say it again because it’s such a lifesaver—yes, you can totally use that dough cycle. If you have a bread machine, just toss in all your liquid ingredients first, then add the dry ones on top. Let the machine do all the heavy, repetitive work of mixing and kneading the dough for you. It saves your arms, and honestly, it kneads beautifully. Once the cycle is done, you just take it out, shape those little guys, and let them rise like normal!
How do I store leftovers and reheat these rolls?
These are tricky because they are so delicious they rarely last long, but if you do end up with leftovers, keep them in an airtight container at room temperature for up to three days. We want those soft fluffy dinner rolls to stay soft, right? If the next day they feel a tiny bit less pillowy, don’t panic!
The easiest way to bring them back to life is the microwave. Pop one (or two!) on a plate, give it about 10 seconds—seriously, start there—and it will steam itself right back into that warm, fluffy state. If you want to do a whole batch, wrap them in foil and pop them in a 300-degree oven for about 5 minutes. That warmth sets the flavor again perfectly.
And remember that freezing trick? If you make them ahead for the holidays, just make sure to use proper freezer storage. Freezing them after the second rise is the best way to preserve that fresh-baked quality until you are ready to bake. I try to keep all my helpful tips in one spot, so be sure to check out my full set of notes if you’re planning ahead!
Estimated Nutritional Data for These Copycat Restaurant Bread Rolls
Because we are using real butter and a good amount of sugar to make these irresistible, I always like to give a quick look at what’s in them. These numbers are estimates based on the recipe serving 18 rolls, of course, but it’s good to know what you’re serving up!
- Serving Size: 1 roll
- Calories: 220
- Fat: 9g
- Carbohydrates: 32g
- Protein: 5g
- Sugar: 8g
Just remember, this is for the roll alone—not slathered in that wonderful cinnamon butter we made. If you need to reach out with any specific questions about ingredients or preparation, you can always find my contact information here!
Share Your Experience Making These Rolls
Now it’s your turn! I’ve shared all my secrets for getting that perfect, soft, buttery texture that people think only comes from a basket at the restaurant. The fun part is seeing how they turn out in *your* kitchen. Did they freeze well? Did you manage to sneak a few before the kids found them?
Please, please, please leave me a star rating right below this section—it genuinely helps other bakers know this Texas Roadhouse rolls recipe really works. And if something wasn’t clear, or if you tried a variation (maybe a hint of orange zest in the butter?), drop a question in the comments!
I’m always tweaking and learning right alongside you all, because that’s what my Grandma Daisy taught me—cooking is a conversation. Your feedback helps us all keep making these amazing rolls time after time. For more insights into our kitchen philosophies and rules of the road, you can always check out the full terms of use for the site. Happy Baking!
PrintCopycat Texas Roadhouse Rolls with Cinnamon Honey Butter

Make soft, buttery yeast rolls at home that taste just like the restaurant favorite. This recipe includes instructions for making the classic cinnamon honey butter.
- Prep Time: 30 min
- Cook Time: 18 min
- Total Time: 1 hour 58 min
- Yield: 18 rolls 1x
- Category: Bread
- Method: Baking
- Cuisine: American
- Diet: Vegetarian
Ingredients
- 1 cup warm water (105–115 degrees F)
- 2 1/4 teaspoons active dry yeast
- 1/4 cup granulated sugar, divided
- 1/2 cup whole milk, warmed
- 1/4 cup unsalted butter, melted, plus more for brushing
- 1 large egg
- 3 1/2 to 4 cups all-purpose flour
- 1 teaspoon salt
- For the Cinnamon Honey Butter:
- 1/2 cup (1 stick) unsalted butter, softened
- 1/2 cup powdered sugar
- 1/4 cup honey
- 1 teaspoon ground cinnamon
Instructions
- In a large bowl, combine the warm water, yeast, and 1 teaspoon of the sugar. Let stand for 5 to 10 minutes until foamy.
- Add the remaining sugar, warm milk, melted butter, and egg to the yeast mixture. Whisk until combined.
- In a separate bowl, whisk together 3 1/2 cups of flour and the salt.
- Gradually add the dry ingredients to the wet ingredients, mixing until a shaggy dough forms.
- Turn the dough out onto a lightly floured surface. Knead for 5 to 7 minutes, adding small amounts of the remaining flour only if the dough is too sticky. The dough should be smooth and elastic.
- Place the dough in a lightly oiled bowl, turning to coat. Cover the bowl with plastic wrap or a clean towel. Let the dough rise in a warm place for 1 to 1 1/2 hours, or until doubled in size.
- Punch down the risen dough gently. Divide the dough into 18 to 20 equal pieces. Roll each piece into a smooth ball.
- Place the dough balls close together in a greased 9×13 inch baking pan. Cover the pan loosely and let the rolls rise again for 30 to 45 minutes, or until puffy.
- Preheat your oven to 375 degrees F.
- Bake the rolls for 15 to 18 minutes, or until golden brown on top.
- While the rolls bake, prepare the butter: In a small bowl, beat the softened butter, powdered sugar, honey, and cinnamon together until light and fluffy.
- Remove the rolls from the oven. Immediately brush the tops generously with extra melted butter.
- Serve the warm rolls with the cinnamon honey butter.
Notes
- For make ahead freezer rolls: After the second rise, you can freeze the unbaked rolls. Place the pan in the freezer until solid, then transfer the frozen rolls to a freezer bag. To bake, thaw them completely, let them rise one last time, and then bake as directed.
- If you have a bread machine, you can use the dough cycle to mix and knead the dough for you.
- These soft fluffy dinner rolls reheat well in the microwave for 10 seconds.
Nutrition
- Serving Size: 1 roll
- Calories: 220
- Sugar: 8
- Sodium: 250
- Fat: 9
- Saturated Fat: 5
- Unsaturated Fat: 4
- Trans Fat: 0
- Carbohydrates: 32
- Fiber: 1
- Protein: 5
- Cholesterol: 25